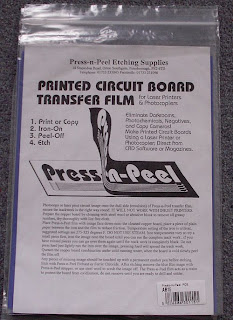
I have been experimenting with Press-n-Peel etching. The sheets are blue and you print your image on the dull side with either a laser printer or a photocopier. I used a laser printer.

The printed circuit board has to be degreased. I used hob brite as it is a gentle abraisive.

This is the film after the design has been transferred to the PCB.

Once the design is transferred to the film you then lay it on the prepared printed circuit board and iron it. This takes some experimenting to get the temperature just right. This is critical in order to transfer the design. Gently peel back the blue film. You then immerse it in Press-n-Peel echant or Ferric Chloride.

Here is the finished etch. I hope to get some time in the studio today to print with it. When I was doing the online printing course a while back Norman made me a lovely printing press - it took him 4 days to make bless his heart - it will be ideal for printing using these "plates".
 I have been experimenting with Press-n-Peel etching. The sheets are blue and you print your image on the dull side with either a laser printer or a photocopier. I used a laser printer.
 The printed circuit board has to be degreased. I used hob brite as it is a gentle abraisive.
 This is the film after the design has been transferred to the PCB.
 Once the design is transferred to the film you then lay it on the prepared printed circuit board and iron it. This takes some experimenting to get the temperature just right. This is critical in order to transfer the design. Gently peel back the blue film. You then immerse it in Press-n-Peel echant or Ferric Chloride.
 Here is the finished etch. I hope to get some time in the studio today to print with it. When I was doing the online printing course a while back Norman made me a lovely printing press - it took him 4 days to make bless his heart - it will be ideal for printing using these "plates".

7 comments:
This sounds a bit mysterious... I'm looking forward to seeing your prints.
I'm looking forward to seeing the results as well. Never heard of this product before.
Hello Carole, this intrigues me also...am I understanding correctly, that once ironed onto the board it creates an actual etched surface? I'm looking forward to seeing the printed image on cloth!
Wow, your husband made a press?! How did he do that? Love your etching.
Lovely to have you back Carol. That sounds very interesting and I had never heard of it before. Are you preparing prints for St David's Day? I will look forward to seeing your prints.
This looks intriguing Carol, Look forward to seeing the results
Haven't heard of this, and it looks so pretty! Sometimes I feel I'm living back in the stone age....
Post a Comment