 I have been playing with image transfers this past little while. This is something I have been doing in my work for a number of years but I revisited it with some new to me media. I have had a package of Epson iron-on cool peel transfer paper for a long time.
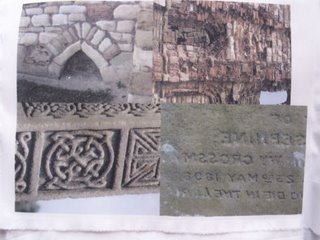
 The above image was a collage of pictures I took at Lindisfarne (Holy Island). Can you spot the deliberate mistake? Yep! I forgot to mirror image the picture on the bottom right. Actually the truth is I did remember but was so keen to see the image transferred I didn't bother to change it. I think it will look great on my quilt the way it is - very arty! This is a really clear and lovely transfer. It does change the hand of the fabric but hey who cares. It is printed on an Epson inket printer and it only took a few seconds to transfer. I like it.
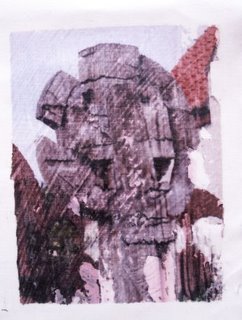
 I used a transparency gel transfer for the above picture. I printed the image to a transparency using my inket printer. Spread Golden Gell Medium (gloss) onto the fabric the transfer was going on to. Laid the transparency ink side down on the gel medium and burnished it for a while....... a long while. I kept checking to see if the image had transferred. As you can see some bits didn't and you can see the strokes where I burnished. It has quite a different look to it - ethereal I think. I might use this one. I did another one of a close up of the walls and it came out really well. I don't know how I managed it .......... because ........
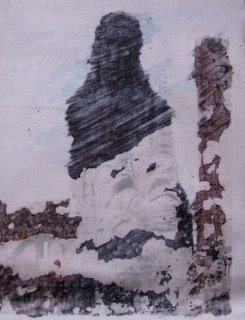
 this is the next one I tried and it didn't work at all. I have a further 5 or 6 I tried and couldn't get a good transfer at all. I gave up in the end and started printing to fabric directly. ( I am used to doing that!
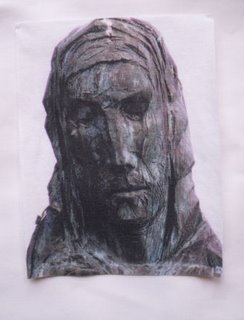
 Here she is printed directly to fabric. I treat my fabric with Bubble Jet Set 2000 before printing. Something else I do is I use tranparencies to back the fabric. I just spray with a little 505 temporary adhesive. Lay the fabric on the transparency and ensure it's nice and flat and even. I then trim the edges to the size of the transparency with my rotary cutter and voila! I find it a better method than using freezer paper because I find the freezer paper either curls up or slips as it starts to print. I don't know of anyone else who uses this technique, I think I invented it but don't burst my bubble by telling me if you know of someone else who used it before 2001! This gives a really nice crisp image and doesn't change the hand of the fabric. This is my favourite method ..... can you tell? However I think the gel transfer method does have potential.
4 comments:
Actually, I really like the unsuccesful image too. It has an ancient sort of quality about it, the missing pieces, that make it a little mysterious. I like that.
I've never heard of using a transperancy for backing your fabric for printing. I think it must be your invention. Maybe you should copyright the idea, & start selling them in a kit! 1 printer sized transperancy, a can of glue spray, ink jet bubble set stuff, & 5 precut pieces of fabric! Along with instructions, it could be a hit!
Hey Smarty..
What a great Idea and it sounds a lot eisier, but you had better do it fast cause you know your read around the world.. It will travel fast.. Kudos to the inventor:):)
Nice idea Deb. Wish I had the time to see it through but I don't.
The more I look at the transferred images on my design wall the more the "unsuccesful" image is growing on me. I might use it yet.
Carol
Hi Dianne,
Thanks for the butterflies they are great. I am not sure I am that widely read but it's a lovely thought.
Carol
Post a Comment