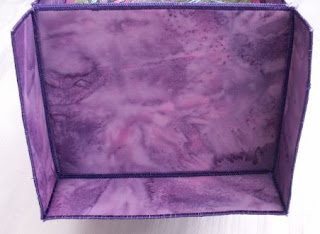
I have been making boxes for many years and I was thinking of a way I could store the many fabric postcards I have received when they are not on display. What better way to store them than in a "Fabric Postcard Box"! I made two boxes to store my many cards. You could of course make them a little smaller by reducing the height of the sides of the box, the other dimensions would remain the same. Each of my boxes store approximately 40 fabric postcards each measuring 4" x 6".
Since the fabric postcards inside the box are the star of the show I have used a simple batik for the inside and outside of the box.
Supplies
Fast2Fuse (or Timtex and bondaweb)
Fabric for the outside of the box
Fabric for the inside of the box
Threads to match or contrast with your fabric
Cut the following from the fast2fuse. Unless otherwise stated cut ONE of each.
Side A 6 ½” x 7” (cut two of these)
Side B 5” x 7” (cut two of these)
Lid 6 ¾” x 5 ¼”
Lid sides 6 ¾” x 2”
5 ¼” x 2” (cut two of these)
Satin stitch around each piece
Cut your fabric slightly larger than the Fast2fuse pieces and cover one side of all pieces of the Fast2fuse with outer fabric and the other side with the fabric you have chosen for the inside of the box.
Using a thread to either match or contrast with your fabric satin stitch around the outside of all of the pieces. I use a stitch width = 4mm and stitch length 0.35mm.

With the base and sides of the box right or wrong side up (make sure they are all facing the same way!) lay them in your work surface as shown in the picture above. You can leave the lid for now.

Take the base and one side, lay them edge to edge and using a zigzag stitch (width 3.5 mm length 0.8 mm) stitch the two pieces together. Stitch the other three sides to the base in the same manner.

Stitch the lid edges to the lid in the same way as you stitched the base and the sides together as shown in the above photograph.
Once the lid is complete lay it edge to edge on one of the wider sides (the back panel of the box), ensuring that it is centred as the lid is marginally wider than the sides (I made the lid 1/4” wider than the base to compensate for the sides of the box), zigzag the lid and side together.

Hand stitch the short edges of the box lid together using either a ladder stitch or whip stitch. The edges at the back of the box lid don't get stitched.
Hand stitch the sides of the box together in the same manner leaving the front of the box free.
I didn't stitch the side edges of the front of the box son that it could fall open to reveal the postcards inside. You could add some ribbon to this part of the box if you liked.Because this box is made in exactly the same way as you make fabric postcards it means you can use any of the techniques you use in your fabric postcard making to make the box. I have shown you how to make the basic model but let your imagination go wild!
Please don't republish these instructions. It is my own creation and I hold the copyright. Feel free to make as many boxes as you like for your own personal use or for swaps.If you make one of these boxes please send me a link so that I can see it.
I am currently designing a box for ATCs and I will post instructions soon!
Download the PDF file for this tutorial HERE


15 comments:
Beautiful,beautiful, beautiful, is all I can say. Your such a sweet heart to give all the instuctions..
Lovely box. Thank you for the tutorial.
Beautiful AND clever design for this box. Thank you for your generosity.
How wonderful!!!!
I don't think I can make one, But I sure am going to give it a try. Thanx for sharing you lovely designer box and for the tutorial too Carol.
You rock
What a good idea. I plan to try one. Thanks for giving us the directions. Sandy in La Center
Thanks for sharing this with us all. I was wondering where to keep my postcards and ATC's, now I know.
Thanks for such detailed instructions carol, i might have to make some time for one of these as my collection is getting out of hand!
beautiful box!! thanks for the tutorial!!
It's gorgeous, Carol! And clever to make the front fall open like that - I really like the design. Thanks for sharing the instructions!
Thanks for the great tutorial Carol. I must make time to make one of those, my collection is also getting out of hand.
Thank you Carol!
This is exactly what I need for my postcards collection.
Carol
Your box is much nicer than the one I've been using.
Thankyou for sharing your expertise via the tutorial.........when I have "time"----
Maureen
Thank you for this...I'll add this as something to my list of things to try this summer.
Thank you so much for this lovely box-tutorial I hope I will be able to make one and send you a link...
What a beautiful way to store your PC collection. Thanks.
Post a Comment